Behind the scenes: building an art studio
It’s a common dream amongst artists to have a dedicated studio space built specially for you. I think it might be less common to believe you can actually have that. For me it was always an ‘it would be lovely one day’ kind of dream.
And then I moved to Cornwall, and ‘one day’ arrived.
{Yes, it was totally that simple. ;)}

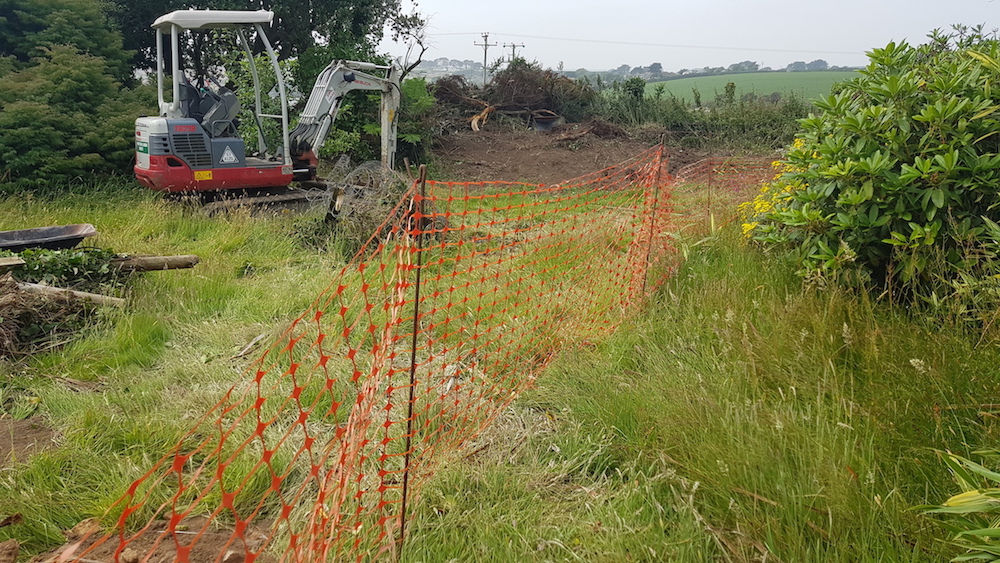
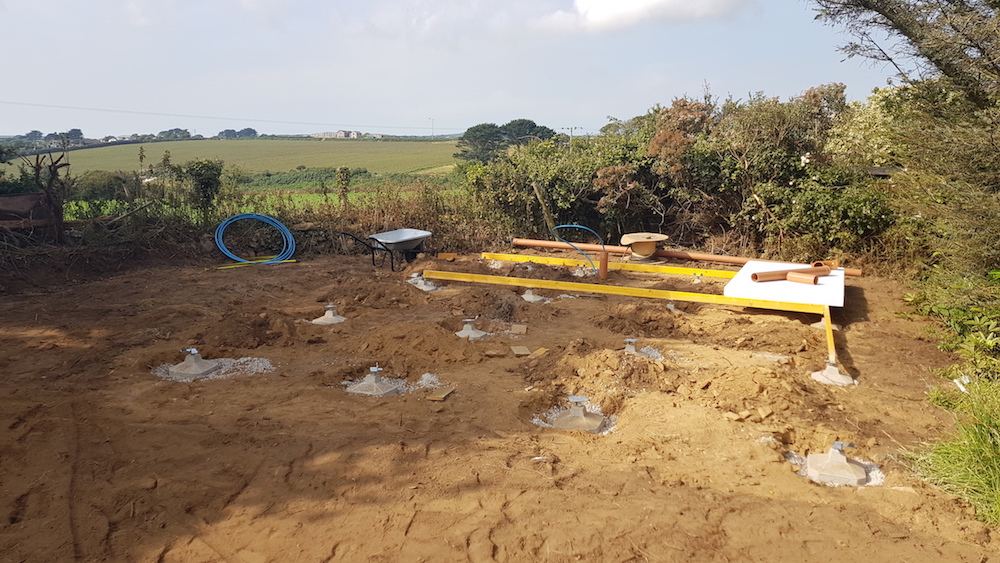
The previous owners turned a field adjoining the property into a gorgeous garden. This is what it looked like before before the decimation began.
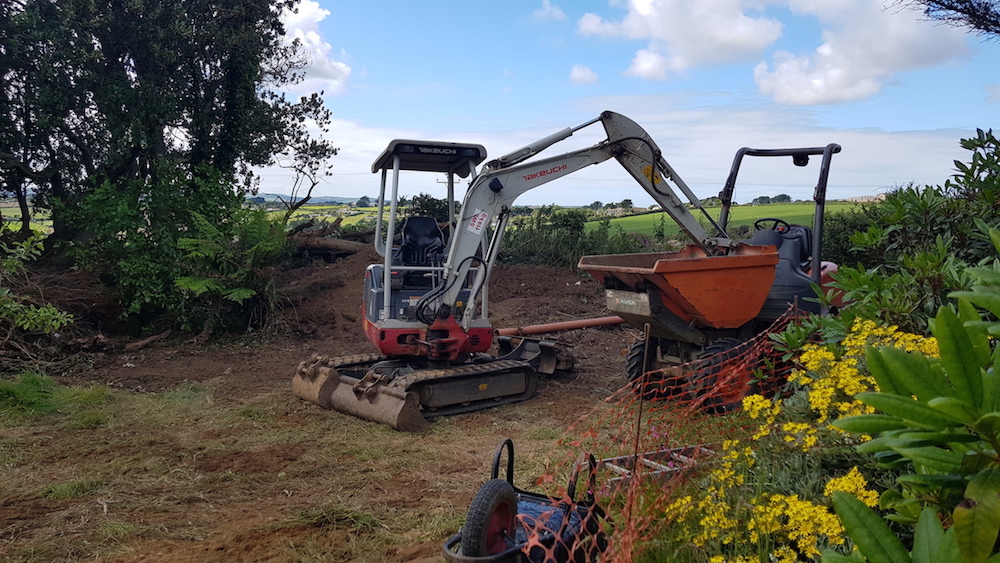
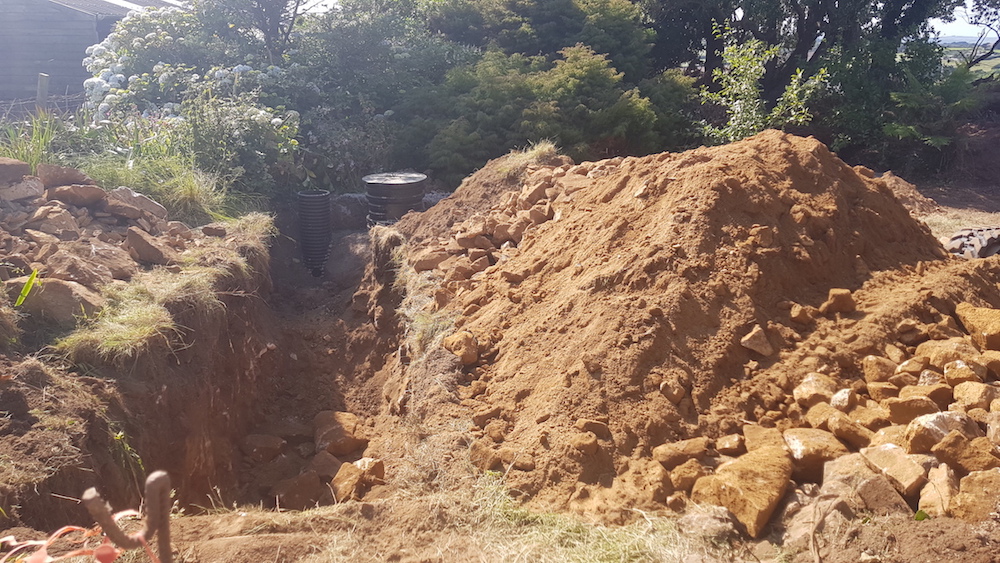
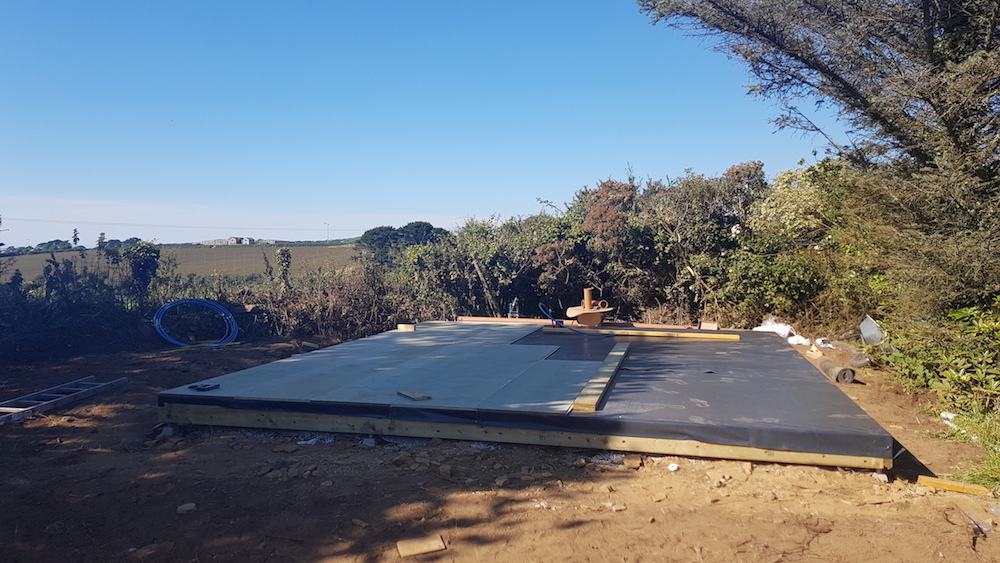
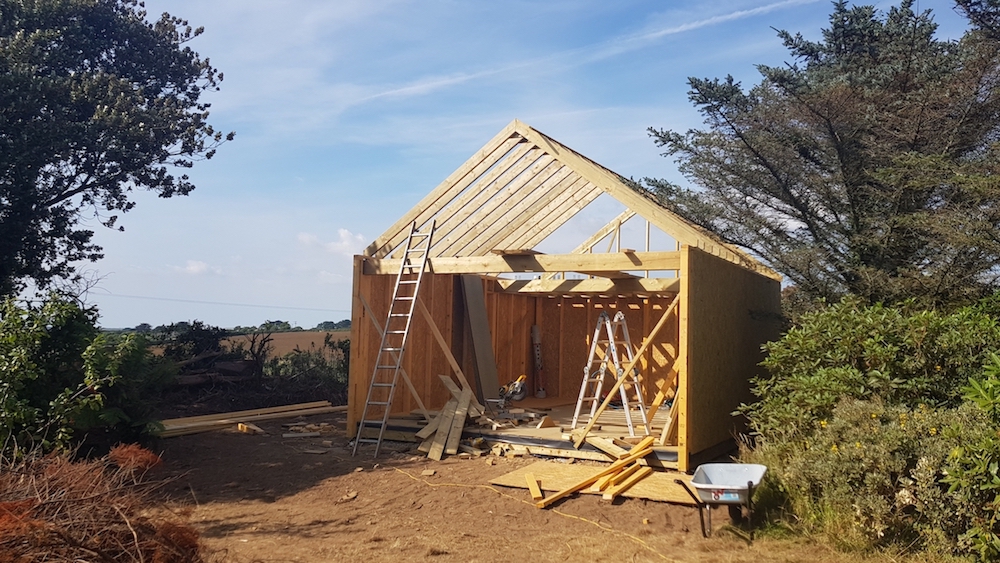
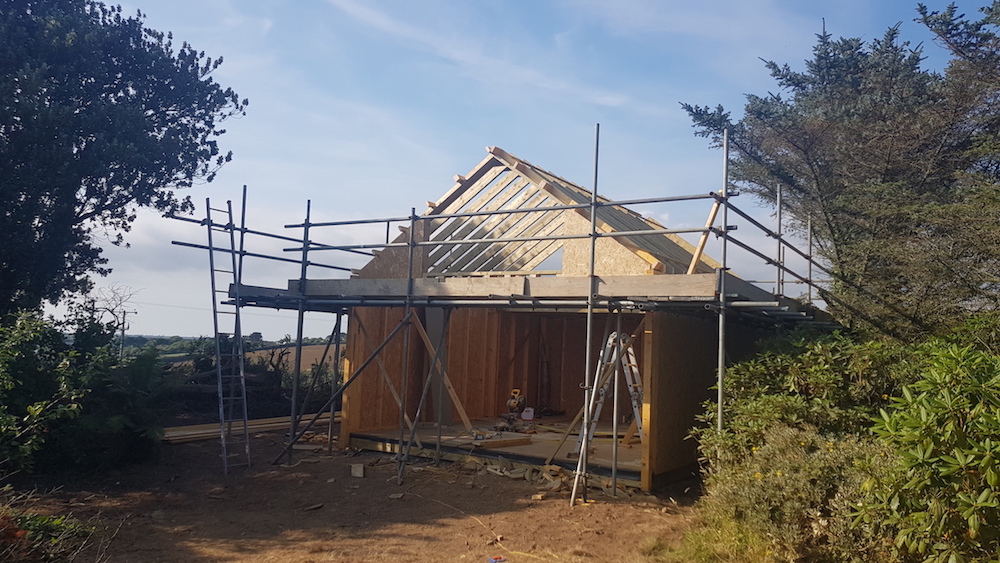
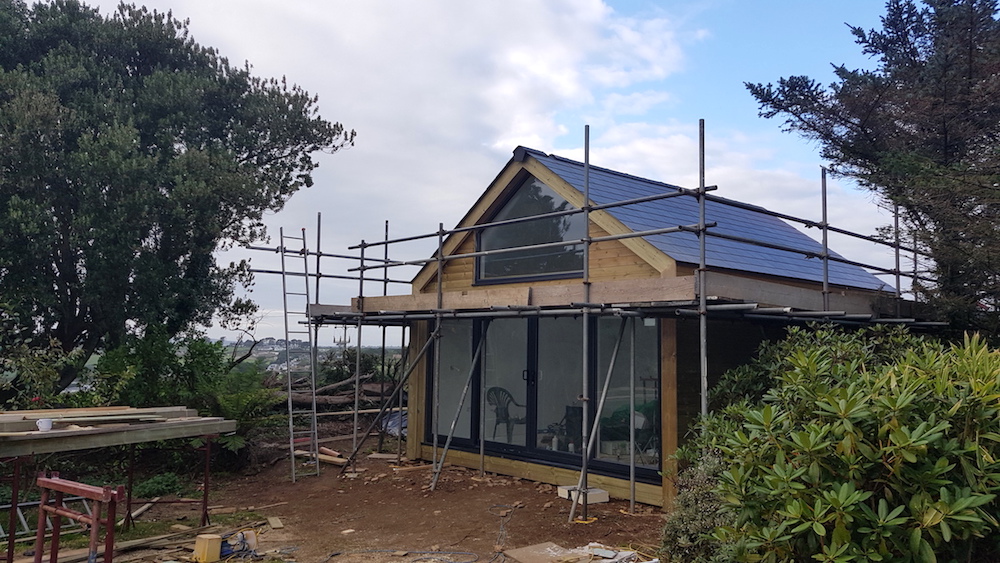
This slideshow documents the progress of the studio build, from lovely grassy area at the bottom of the garden, through some alarming destruction, to the completed building.


I’d like to say I built it myself, but it’s important in life to know your limitations, so I hired the phenomenal Tom Sharp and Hugh Lincoln, of Lincoln Sharp Contractors, to do it for me. They are also responsible for the total renovation of the barn conversion that is now my new home.
There were plenty of horror stories that came out of the woodwork when I started talking about the renovation and build, and I’m happy to report that Hugh and Tom’s work {and presence} literally could not have been further from that. You know you’ve made a good choice when you’re handed a colour coded spreadsheet of all the planned stages of the build right at the start. I couldn’t have asked for more efficient, creative, focused, skilled, dedicated, lovely builders.
There were a couple of delays due to unforeseen circumstances, but with both barn and studio completed within nine months, I don’t have a single complaint.
Anyway, back to the studio.

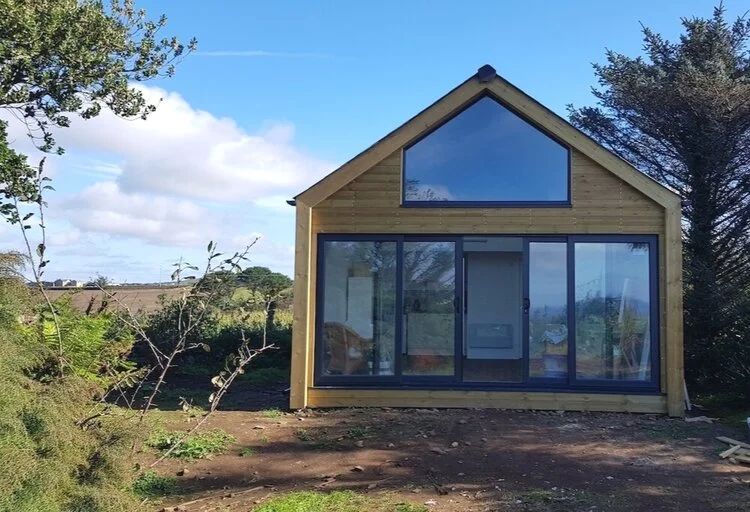
The plan, drawn up by an architect, was to build a simple studio that would have storage space, a corner for making coffee, and a toilet. I wanted to be able to ‘go to work’ and not have to run back to the house for anything, which tends to break the flow.
So the studio would need plumbing and electrics, and then it seemed silly not to make a little shower room and kitchenette, since we were running the cables down there and putting in a small septic tank anyway. It wouldn’t cost much more and would give the building possible alternative future uses, such as guest space, holiday let potential, or a place for me to stay if I decided to let out the main house at some point.
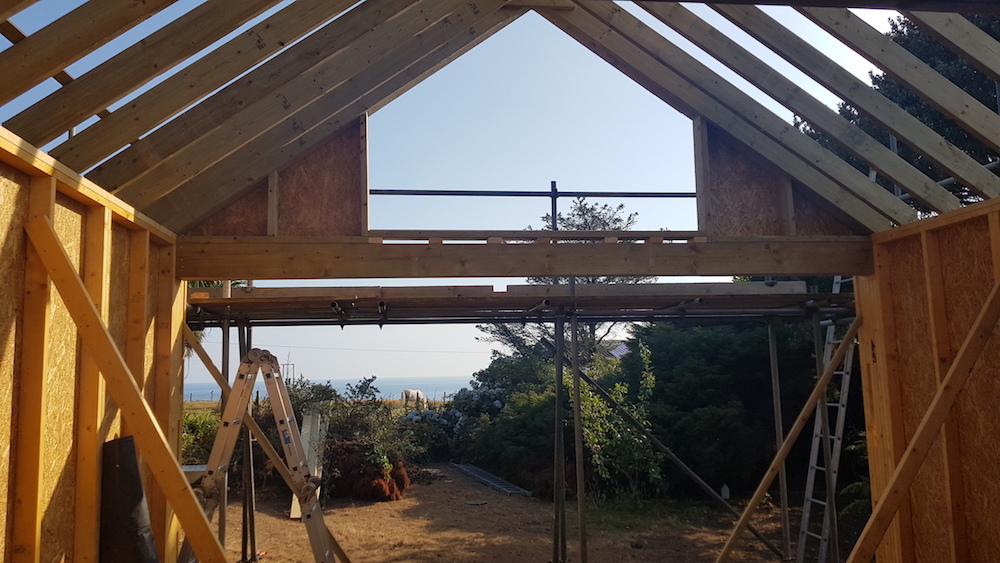
The storage space would be up on a mezzanine level, reached by a ladder. I could store canvases and other supplies up there, but it could also serve as a sleeping area.
And so the shed style studio I’d tentatively been envisaging became a small house.

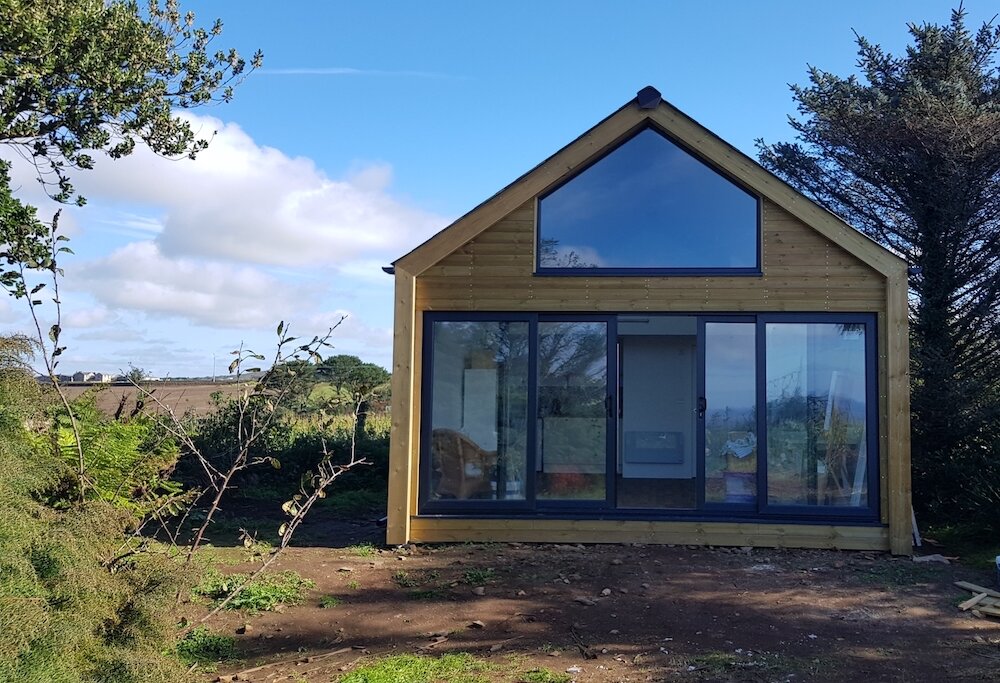
The views from the back are of lovely rolling fields.
You may be wondering what all that meant for the budget. Without going into the finer details, this is not a cheap build, being put together from the ground up without a prefab shell. However, my business teaching online courses for the past six years has been quietly growing, and I was delighted to discover it would cover the costs without being wiped out entirely.
I did have a wobble early on. I basically hit my ‘upper limit’ of what I believed I was ‘allowed’ to have in life, but after a few conversations with wise people, and a lot of thinking and writing, I realised that:
a} working hard for the past six years meant I could afford this
b} it’s an investment in my career, as it’ll enable me to focus on painting and selling my work
c} it’s a business expense
d) it increases the value of the property overall
e} if I could make enough over six years to afford a studio, I could make enough to recoup those costs as I continue to work on both my own painting and my online business
This probably all sounds obvious and a rather unnecessary justification, but we all have upper limits, and hitting them can be uncomfortable - and inhibiting - until we clear out the outdated limiting beliefs in our way.
I’m still astonished that this is happening, but at least now I believe I’m allowed it. ;)
Yes, it also has a sea view. {I know.}
The following photos show some of the details of the build.

The roof insulation goes in, the mezzanine is up, and the structure for the shower room and kitchenette are coming together.
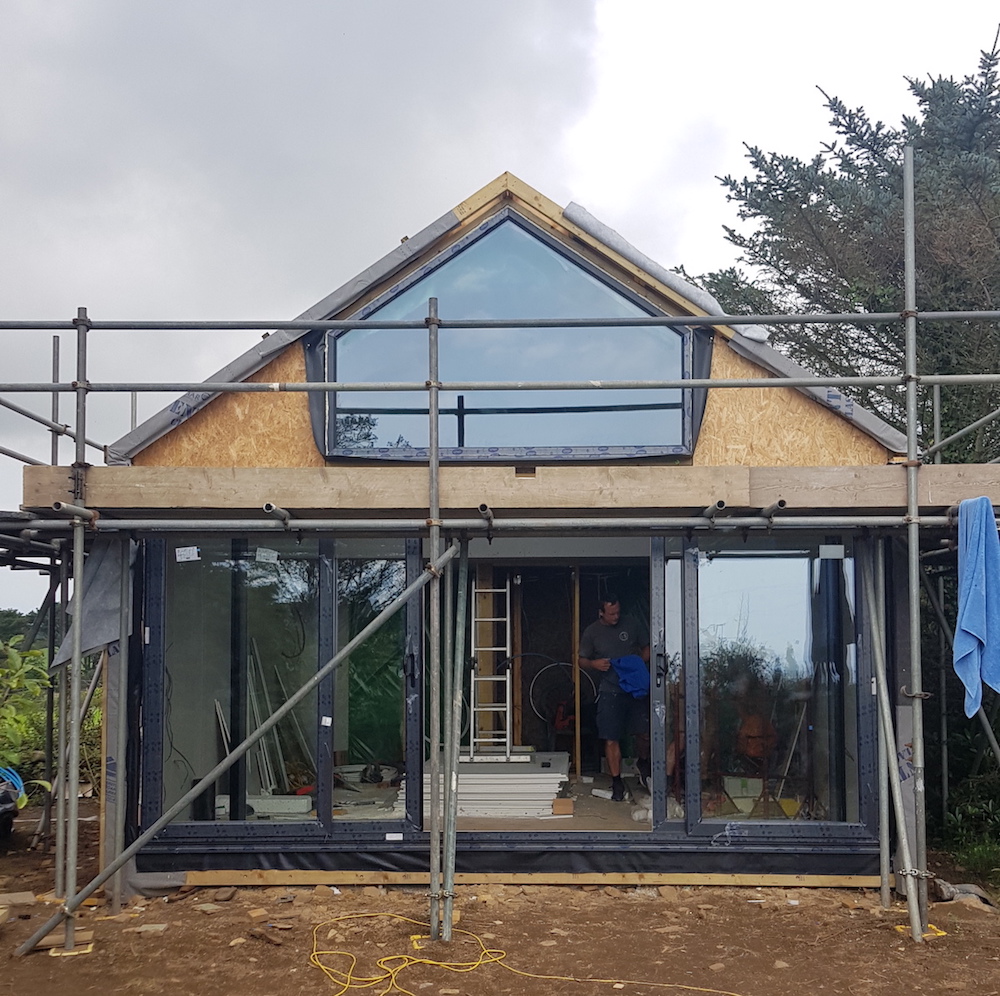
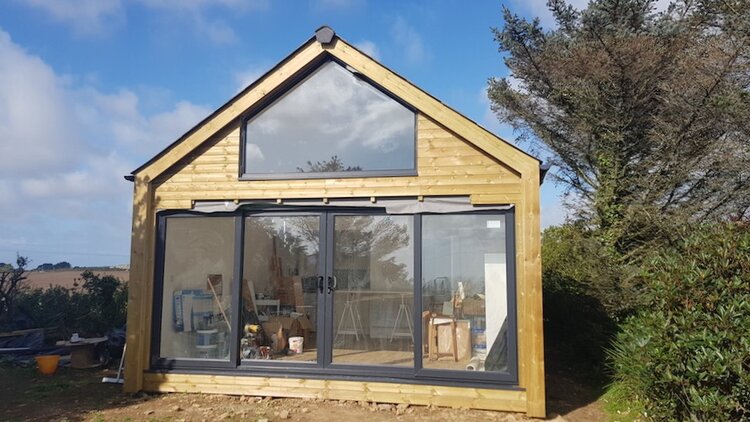
The day the windows went in was a good day. The original plan to have a wall of windows was going to be too expensive, so Hugh designed the upper window to help keep within budget while letting maximum light in. The sliding doors are UPVC in Anthracite grey. The studio is south facing so will have low heating costs due to roof, wall and floor insulation and plenty of sunshine. {Well, some. This is Cornwall, not the south of France.}
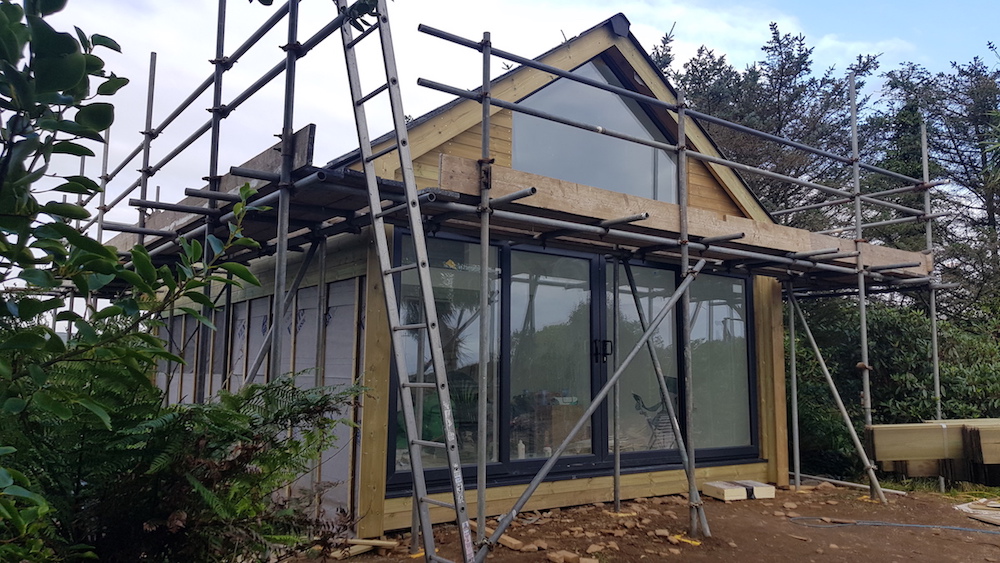
The studio is clad in tanalised wood. It starts off with a green tinge, turns gold, and ends up with a silvery look, not unlike cedar cladding but more affordable. My bedroom is clad the same way and at time of writing is in the gold phase - beautiful.

L-R: Insulating the walls and roof; plasterboard; plaster and storage sections on the mezzanine; paint!

The flooring goes in; I was going to leave it at the plasterboard, but then remembered my process is quite aquatic! I chose wood effect vinyl to be as water resistant as possible while still being affordable. It’s the perfect backdrop with the white walls and ceiling, and being made for bathrooms is also non slip.

One of my favourite things in the studio is this custom built sink. I found a photo on Pinterest and showed it to Hugh. Initially we didn’t think it would work because of the sinks we’d been looking at, but then Hugh found this butler’s sink on Facebook Marketplace. He also happened to have a piece of worktop salvaged from a school science lab {complete with pen drawings and chewing gum}, which, after a sand and oil, looks absolutely gorgeous. He and Tom built the shelving, and created a splashback with tiles leftover from the barn renovation.

The tiny kitchenette sits in a little alcove at the back of the studio. A simple run of three cupboards, an under counter fridge with freezer compartment, and more leftover tiles from the barn renovation give it character while being functional. Perfect for essential coffee and tea while painting, and adaptable {with microwave and shelf above, added later - also cupboard knobs!} for longer term use. There’s a little hot water tank in one of the cupboards too.

The shower room we kept super simple. Basic Metro tiles {with some grey grout that makes me feel much cooler than I actually am}, an electric shower, and simple shower, basin, tap and toilet. The mirror belonged to my granny; it was dark wood and I painted it with Annie Sloan Greek Blue chalk paint left over from doing the kitchen table legs back at the house.

Being a total book nerd, I’ve always loved the idea of a library ladder - the kind that slides across the bookshelves in a big old fashioned library. So of course it was the obvious choice for getting up to the mezzanine level in the studio.
A simple metal pole held by brackets - with hooks on the ladder - allow it to slide out when I want to use it. The ladder has lovely flat treads, and feels good and sturdy without taking up too much space. The ladder can also be unhooked and leaned against a wall if necessary. I chose a simple blue and white patterned vinyl for the mezzanine flooring. Tom built shelves into each side to house older work and other art bits and pieces.
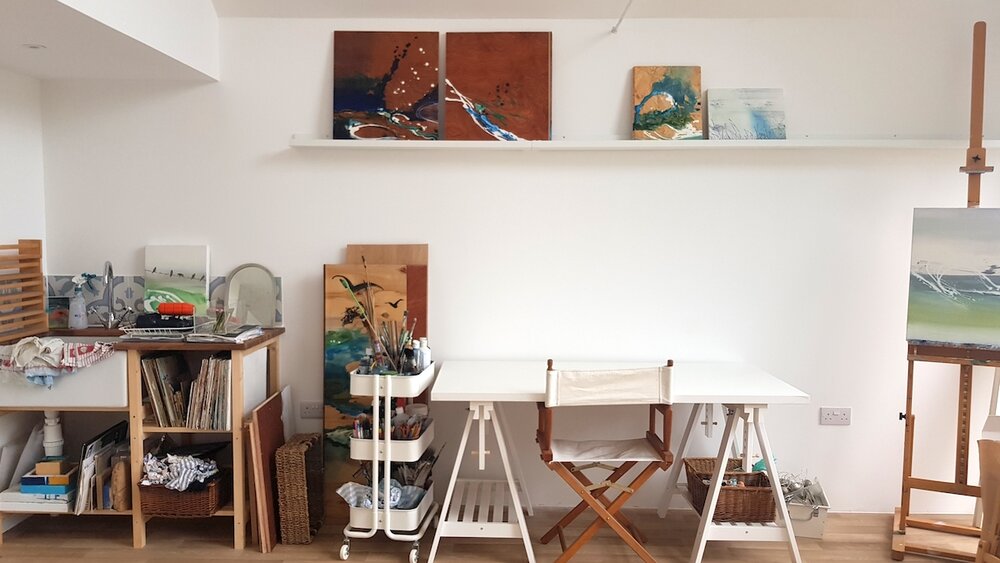
The studio is now ‘officially’ finished in terms of the build. There are still things I want to do, most notably sort through and tidy away a lot of the past work and materials I brought with me. While a working art studio will never be pristine, I want the space as clear as possible so I can focus on the work and not be tripping over things or trying to find things all the time.
But apart from that, there’s nothing between me and the painting now. Time to get back to work!